By Brandon Buck
We create and operate a lot of lead-generation campaigns at The Pollack Group. Typically, our clients are in need of new customers, and we’re tasked with augmenting the marketing and communications to scale up customer acquisition. One of the best ways we help with customer acquisition is through search marketing.
People usually search on Google for a solution to a problem they’re having, which means we can capture them as a warm lead. You don’t usually search for a plumber unless you actively need plumbing service. Therefore, we don’t need to advertise to millions, but instead the few hundred people in our area that need help with their plumbing. If our client offers a product or service, we can create a search campaign for only the people with the desire for their product or service.
And because Google’s search platform is still the most powerful search engine on the planet, they work hard to make sure that their service is helpful for both the end-user and advertisers like us. So as long as we set up the right conversion metric for Google, we can assist the search algorithm only to find us the best clients and customers.
When people search on Google, Google delivers an advertisement based on a vast amount of variables: the device the user is using, the time of day, the websites they’ve visited, the trends of searches they’ve completed, etc. Far too many to list and, frankly, too many to care about. But search algorithms keep track of these variables through a unique identifier called a Click ID. Google’s Click ID setting is called GCLID (Facebook also creates unique session identifiers with FBCLID and Microsoft Bing with MSCLKID). These aren’t unique IDs of the user but rather a unique ID to the advertisement session served to a user (i.e. a person can’t be identified directly through their Click ID).
One benefit of manually attributing value in Google Ads is that you can create your own system of value, scoring, and worth that works for your business. For a direct sale, when you sell a commodity for a specific amount, it’s easy to track profitability or waste in advertising– Return On Ad Spend (ROAS) is the industry metric for marketing spend over revenue. When your product or service doesn’t have a direct sale or needs to be made offline, the calculation can quickly become uncertain as a lot of variables come into play.
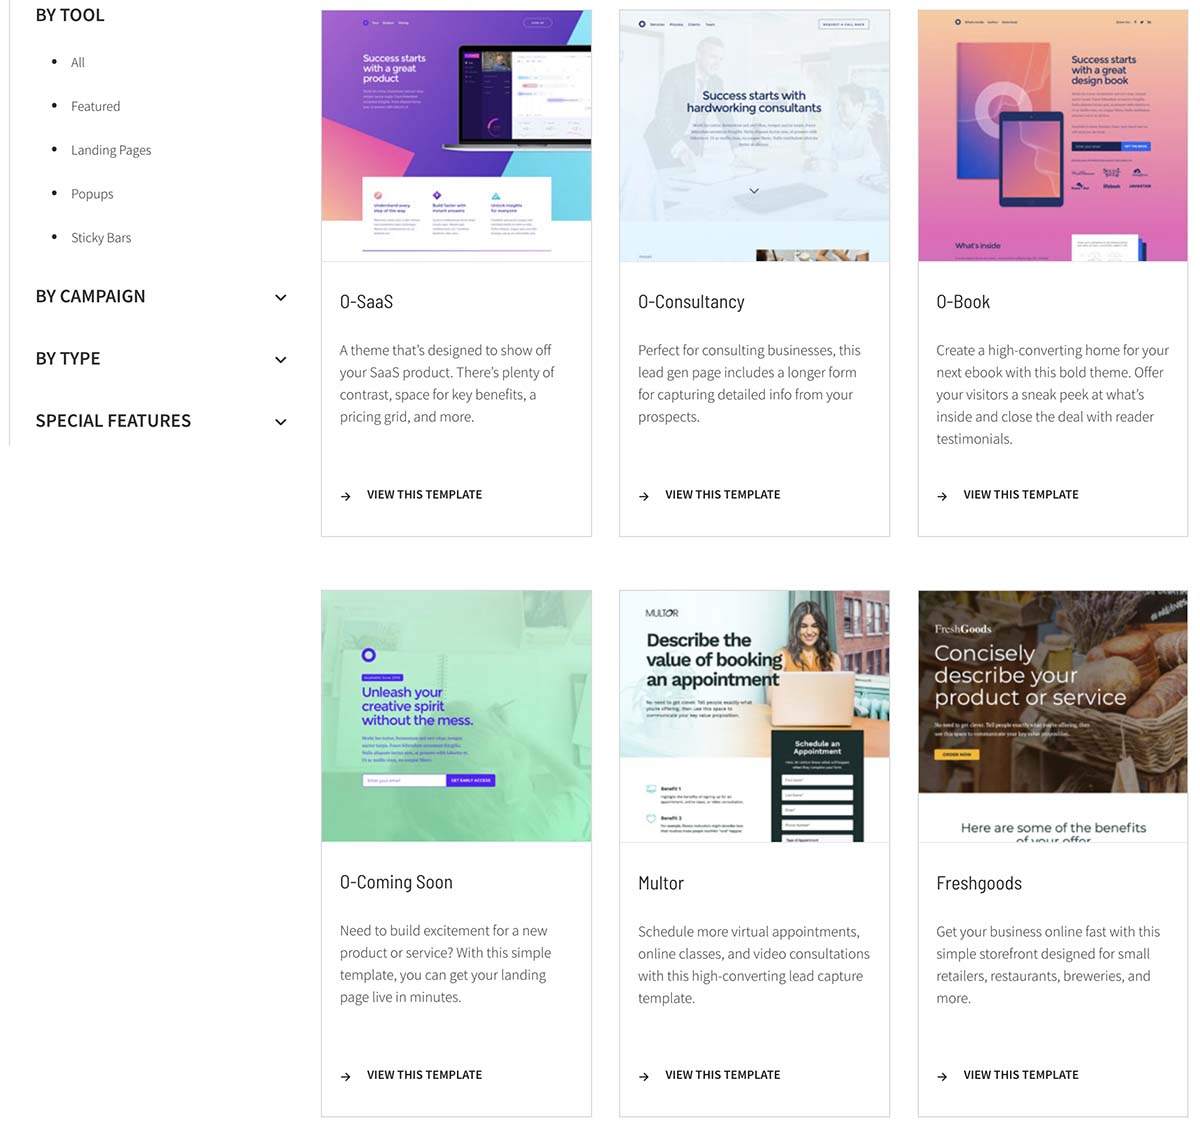
At our agency, we like to use Unbounce as our Landing Page service. It lets us quickly create unique landing pages, duplicate existing designs, integrates very well with many online services, and has a robust and active expert community online for support. The tutorial below for having unique lead conversion values uses Unbounce, but the method can be applied on any platform that you’re able to customize.
Step 1: Create your Landing Page in Unbounce
Unbounce provides a lot of templates that you can use to build your lead form landing page, or you can build something entirely from scratch without any knowledge of HTML or coding (often referred to as WYSIWYG- What You See Is What You Get). You won’t need custom code for most basic landing pages, whether your Call To Action is a phone call, form entry, or email signup, but to really get the full benefits of Unbounce, you can still utilize custom CSS and Javascript.
For this tutorial, we are not using any custom code, but we are diverging from the standard Unbounce template. The first step is to create your landing page, or what the user will see when they click through an ad. Our example here is a simple page that lets users fill out their names and contact info for more information.
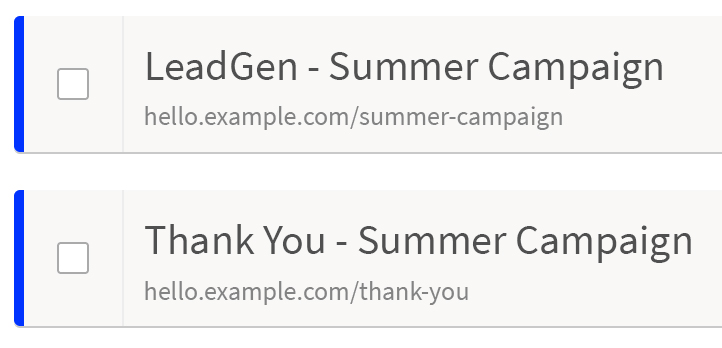
Step 2: Create a new page – a Thank You confirmation page
By default, Unbounce creates a standard confirmation page, or Thank You page, for lead capture. Confirmation Pages are not necessarily for the user to know that their information has been received, or to be greeted with a warm Thank You message, but rather to trigger a signal to the website that a full conversion was captured- in this case, the contact information for a new lead.
With Unbounce’s standard Confirmation Page, we can only send Google Ads one signal that a user filled out the form. By creating our own Confirmation Page, at a unique URL, we can send over more data.
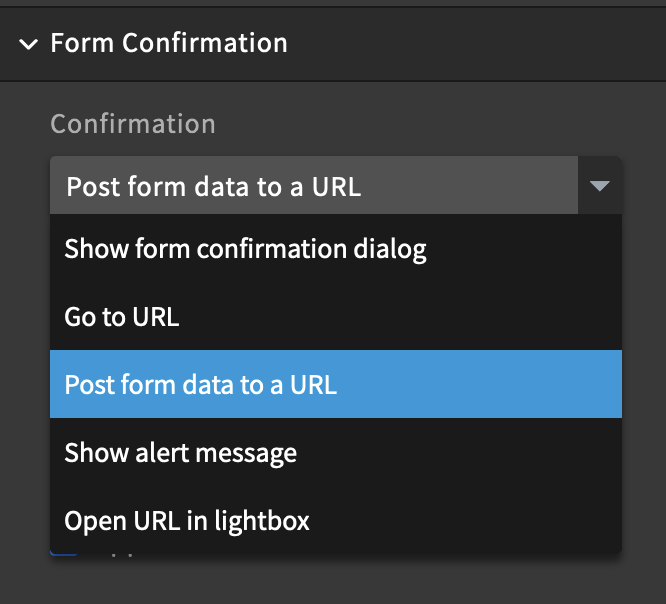
Step 3: Send all form entry data with the URL to the standalone Thank You page
Unbounce provides a few options for Form Confirmation. The default option is Show form confirmation dialog, but we want to send users to the new Thank You page we created. We also want to include some of the field data from the form that the user filled in, which will be included in the URL if you select Post form data to a URL.
Now when a user submits their form data, instead of going to
www.UnbounceThankYouPage.com… they go to: www.UnbounceThankYouPage.com/?first_field=First&second_field=Second
This option will allow Google Tag Manager to parse specific form entries from the URL and signal different values to Google Ads.
Step 4: Link Google Ads and Google Tag Manager to work together
Google Tag Manager is a tool that allows more custom control in a website’s functionality, particularly implementing actions that the web visitor doesn’t see. It’s an easy toolbox for implementing tracking tags, like Google Analytics, Facebook Business, and LinkedIn Insight pixels. In this case, we want to create an alert on the Thank You page of our form back to Google Ads, but with one of four possible values.
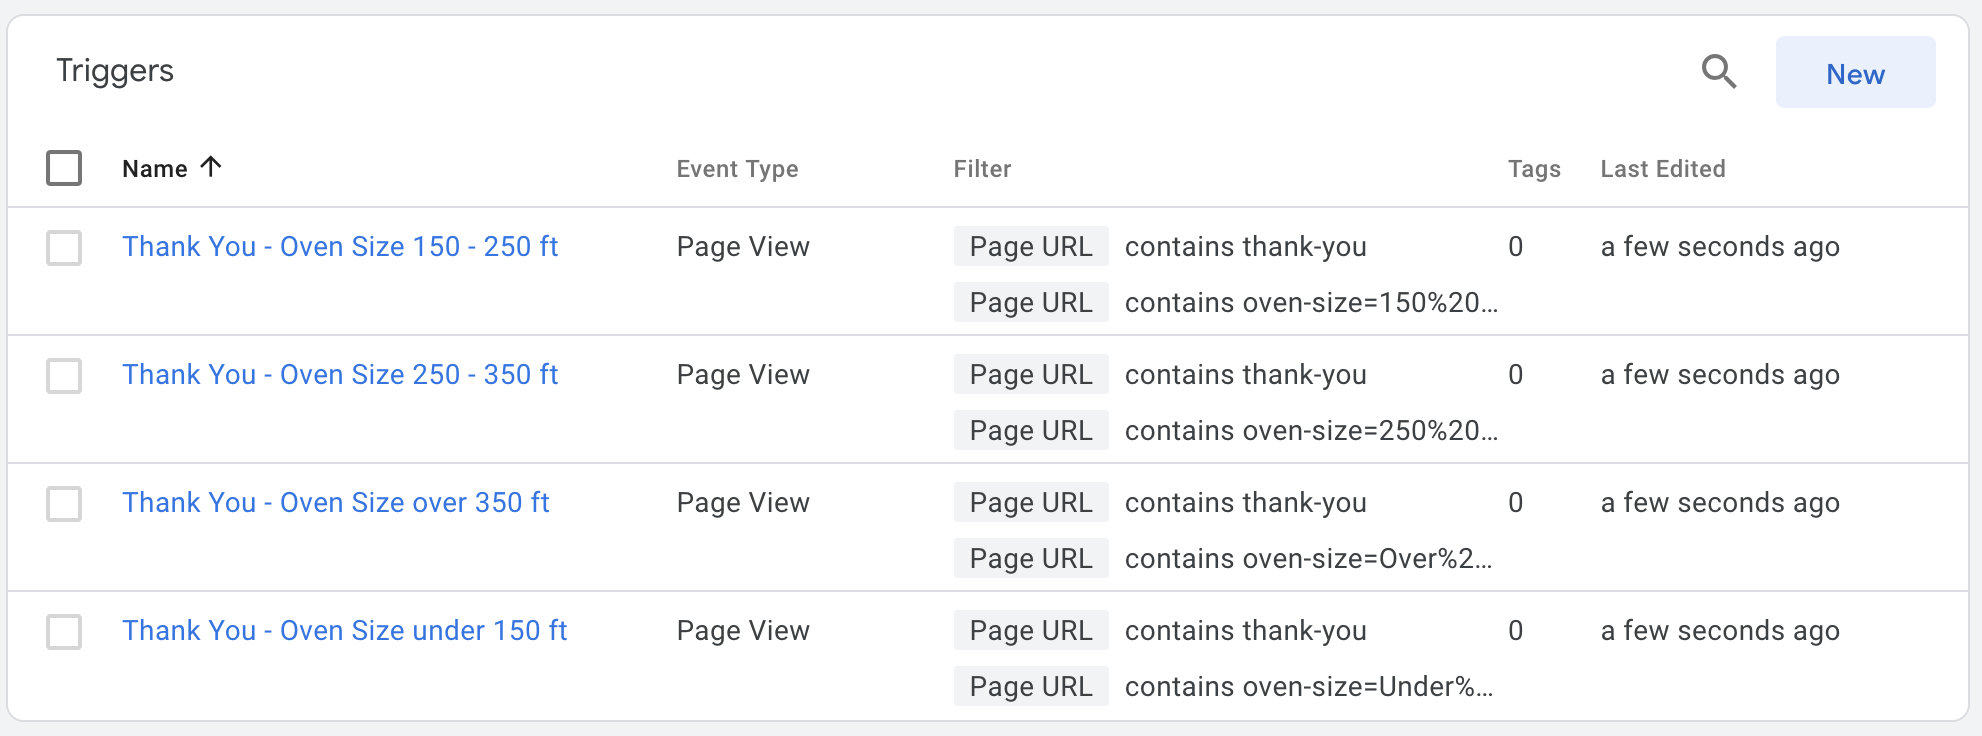
Step 5: Test form submissions to find the URL parameter for each option
Depending on how many options you have in the dropdown menu, it’s best to test out the form and see exactly what URL gets delivered. In our case, here are the four URL parameters that come from the four dropdown options
oven-size=Under%20150%20cu%20ft
oven-size=150%20-%20250%20ft
oven-size=250%20-%20350%20ft
oven-size=Over%20350%20cu%20ft

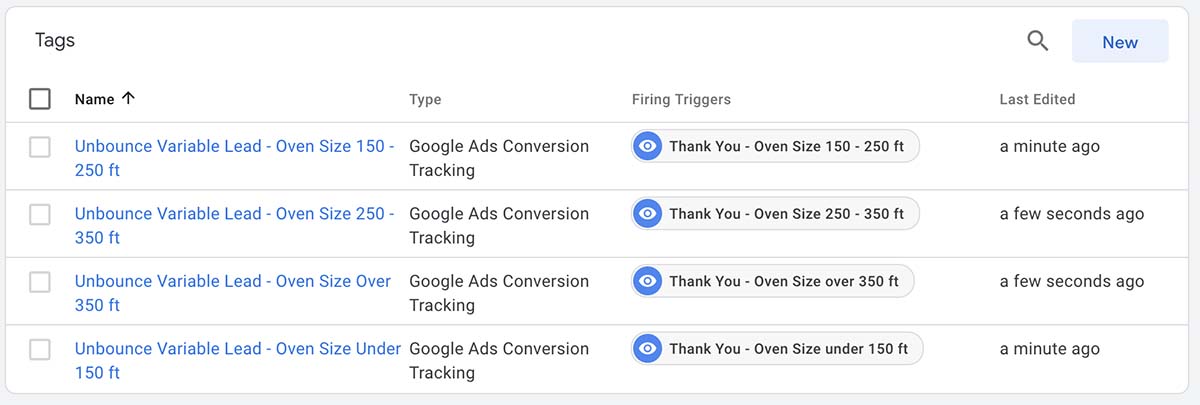
Step 6: Create four Triggers in Google Tag Manager for each URL parameter
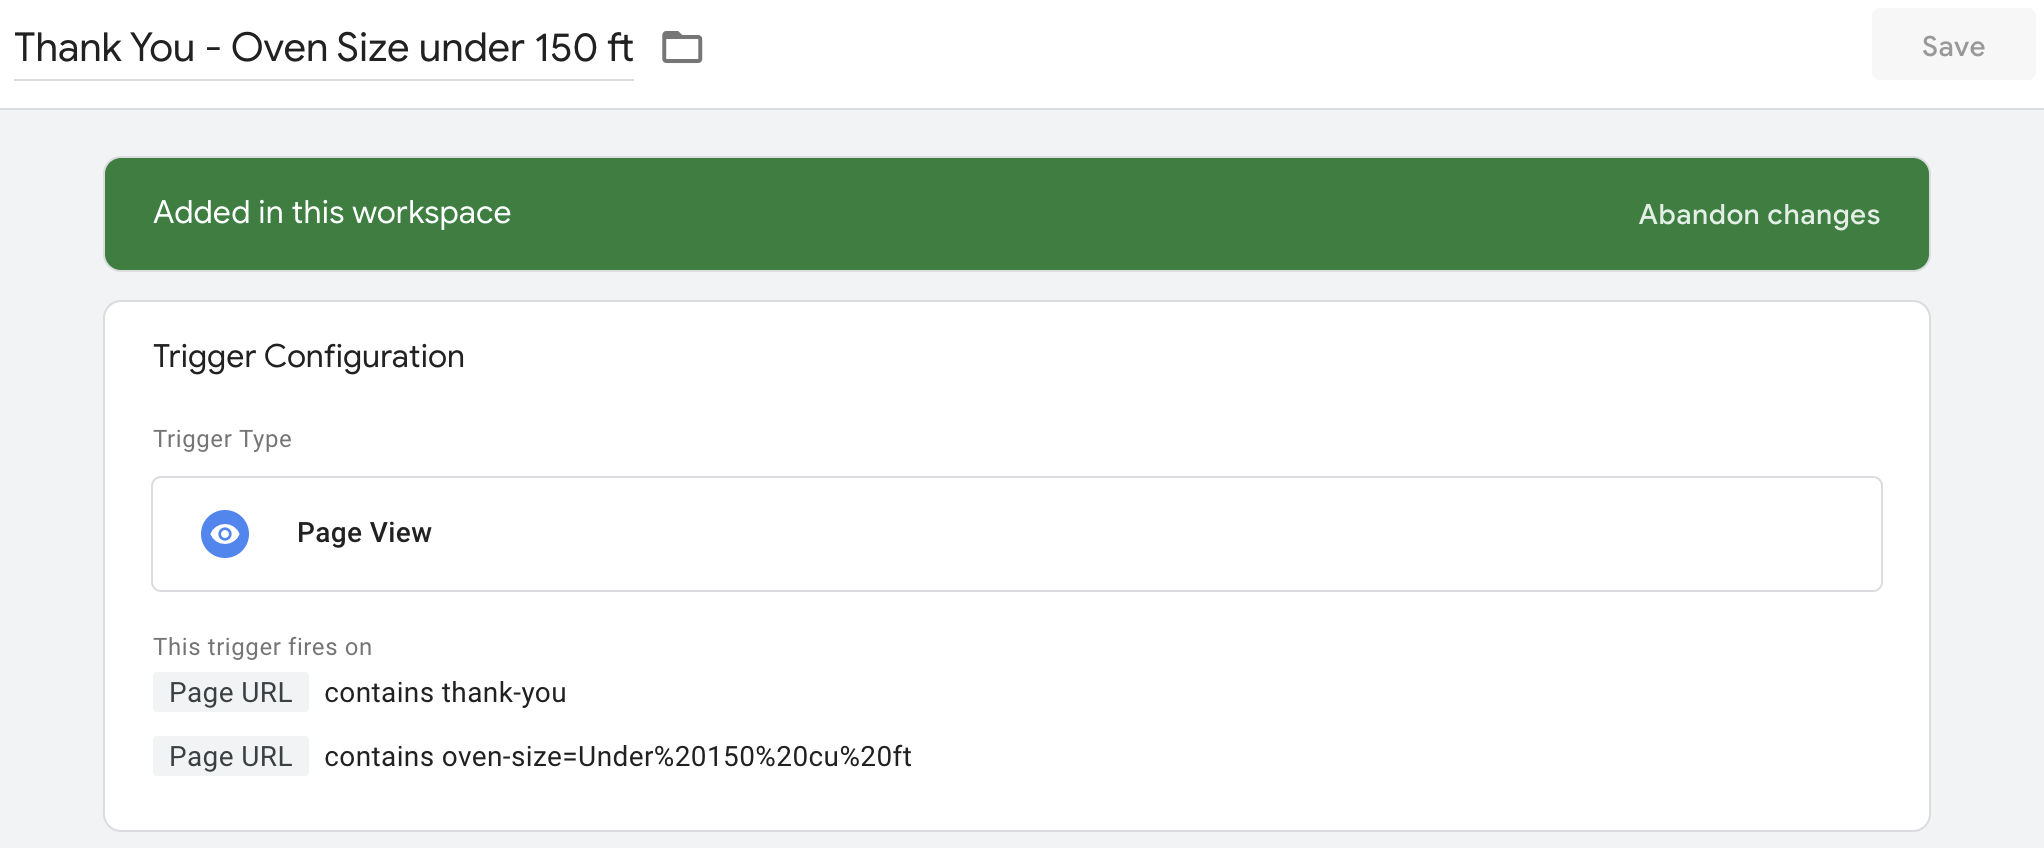
A Tag in Google Tag Manager is an action that Google takes, and a Trigger is what needs to happen for that signal to initiate. In our case, to differentiate the values of the Tag, we’re going to set up a few Triggers. Create as many Triggers as there are options in the form dropdown menu- in our case, there are 4.
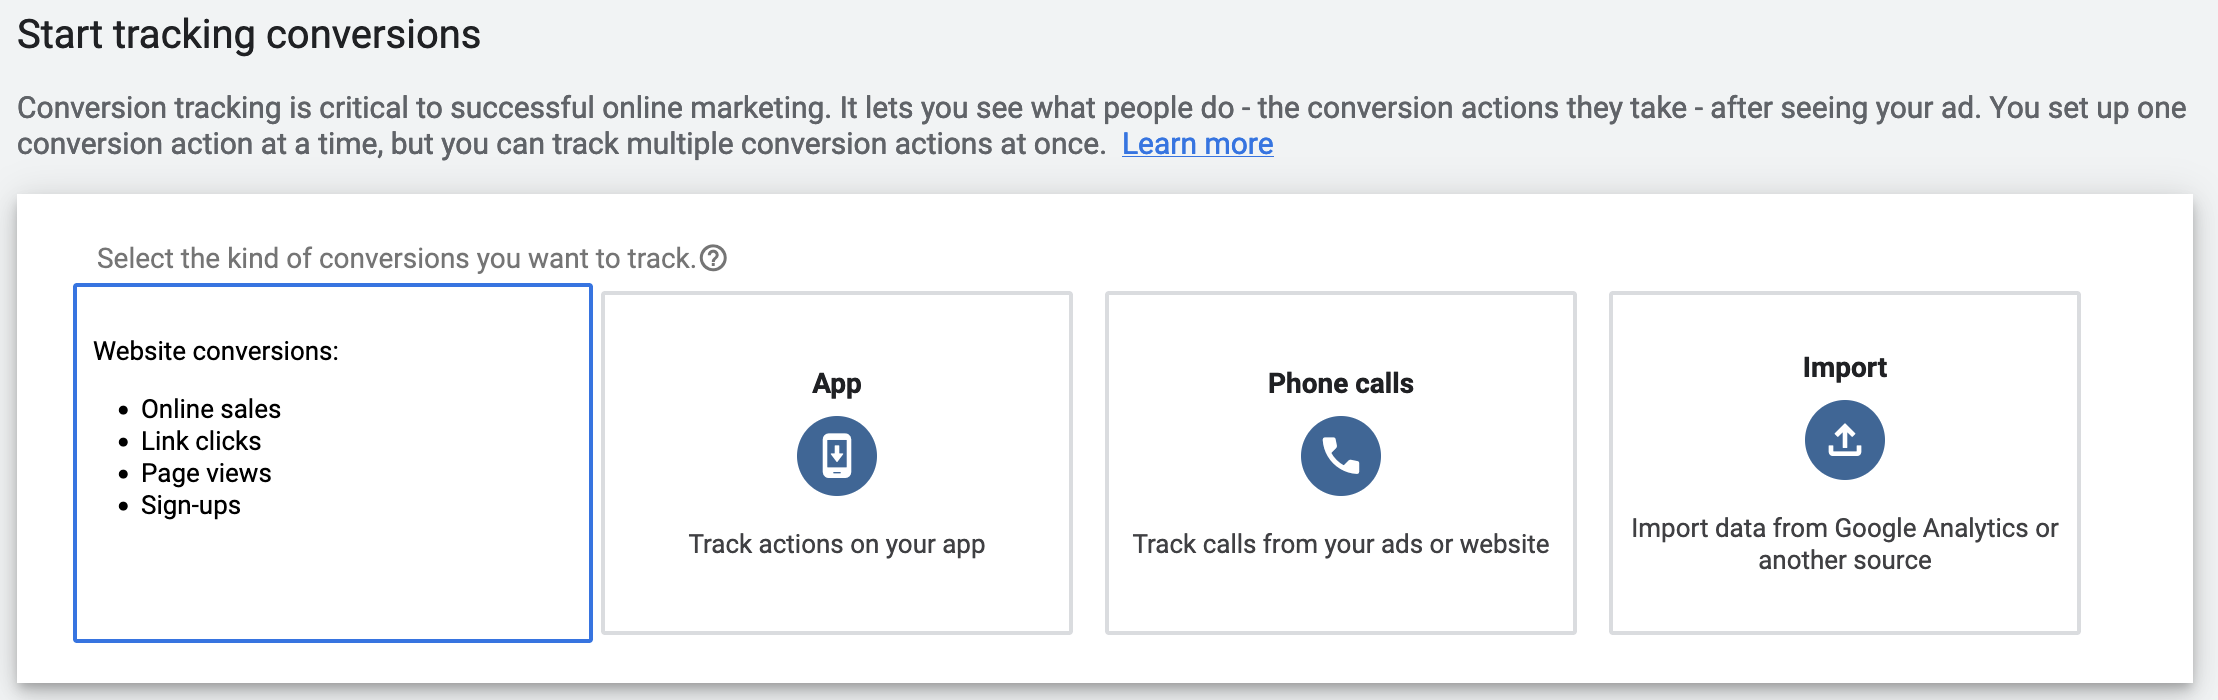
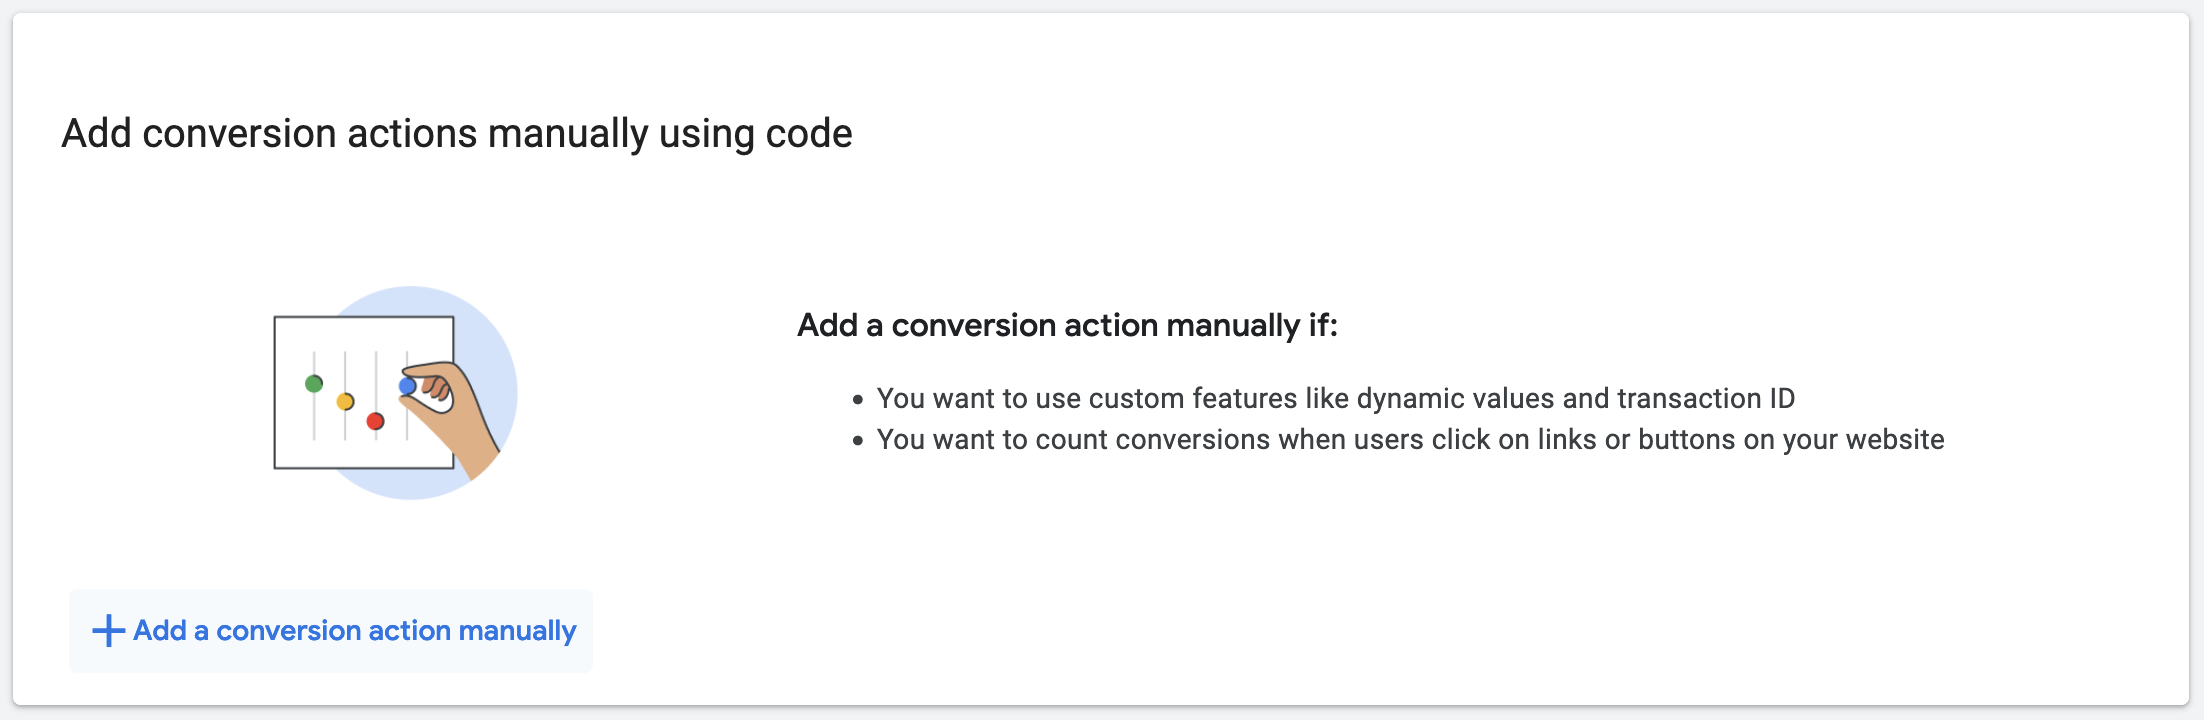
Step 7: Create a Conversion in Google Ads for a lead
a. Create a new Conversion in Google Ads

b. Select Website Conversion
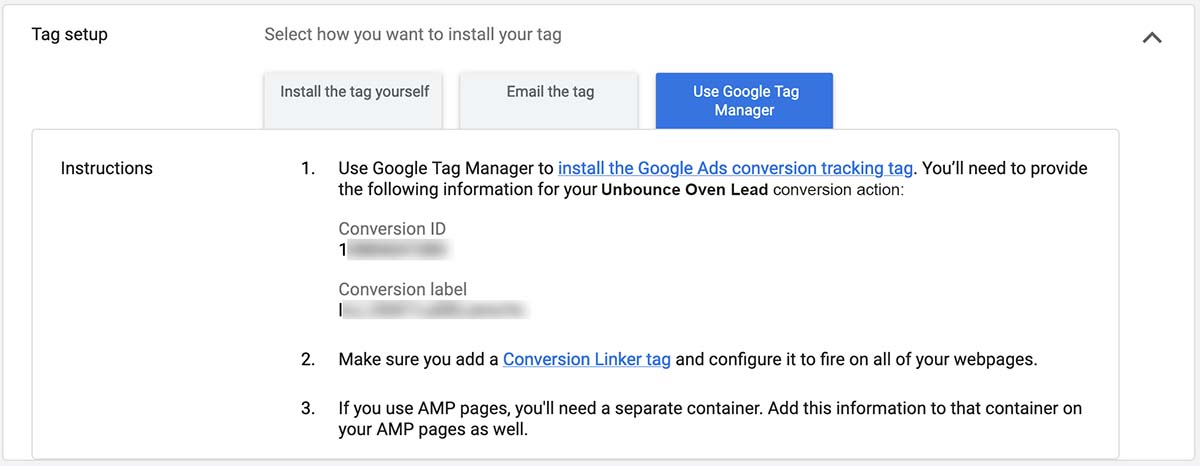
c. Add the code manually
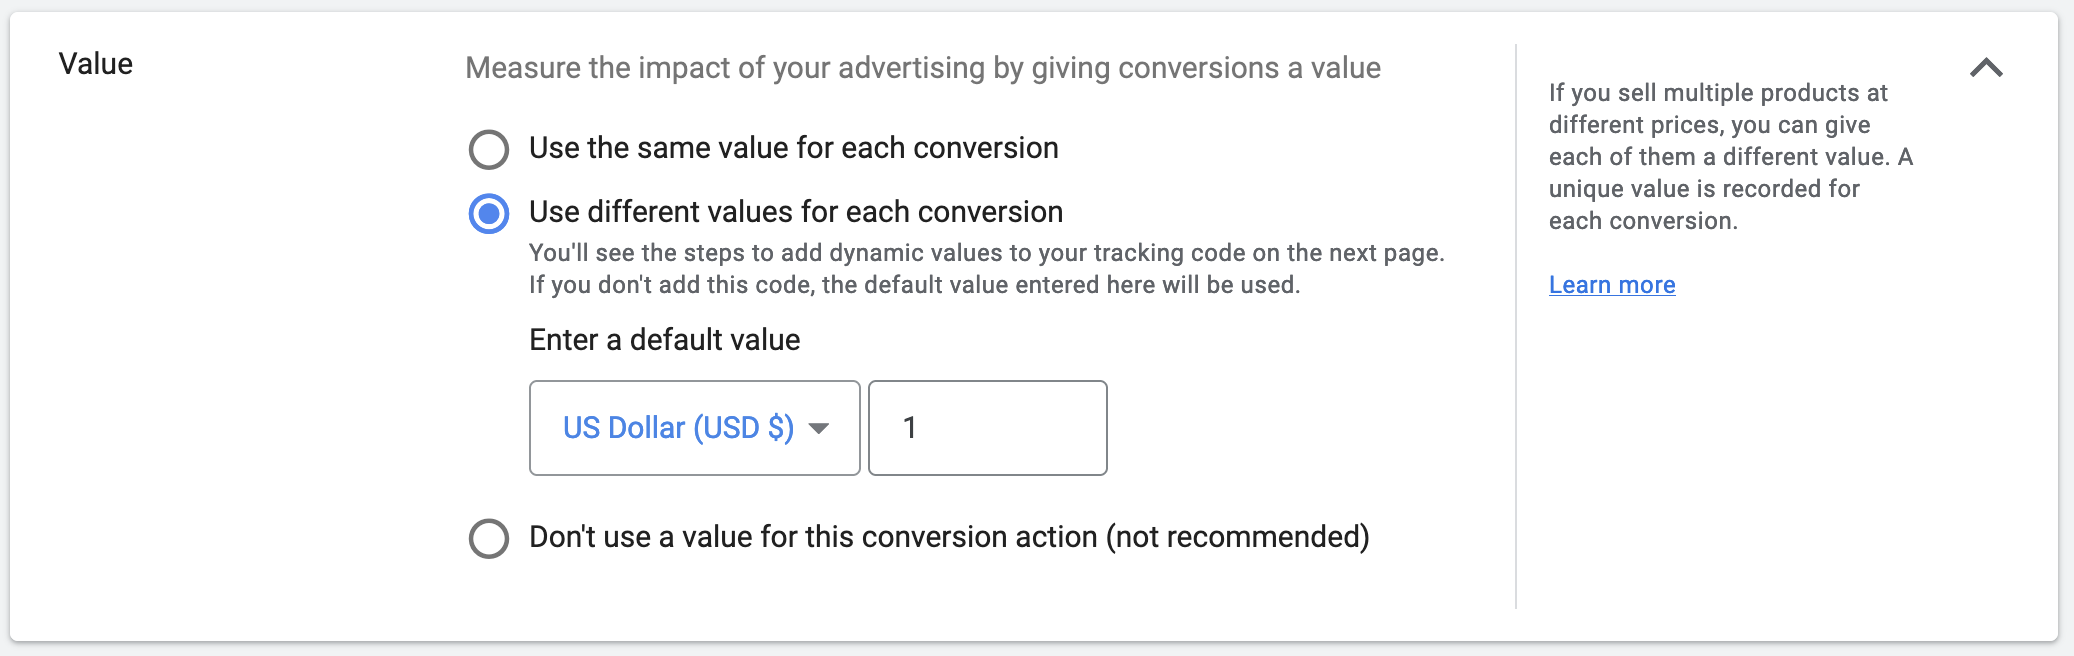
d. Select Different Values For Each Conversion, set the default to $1
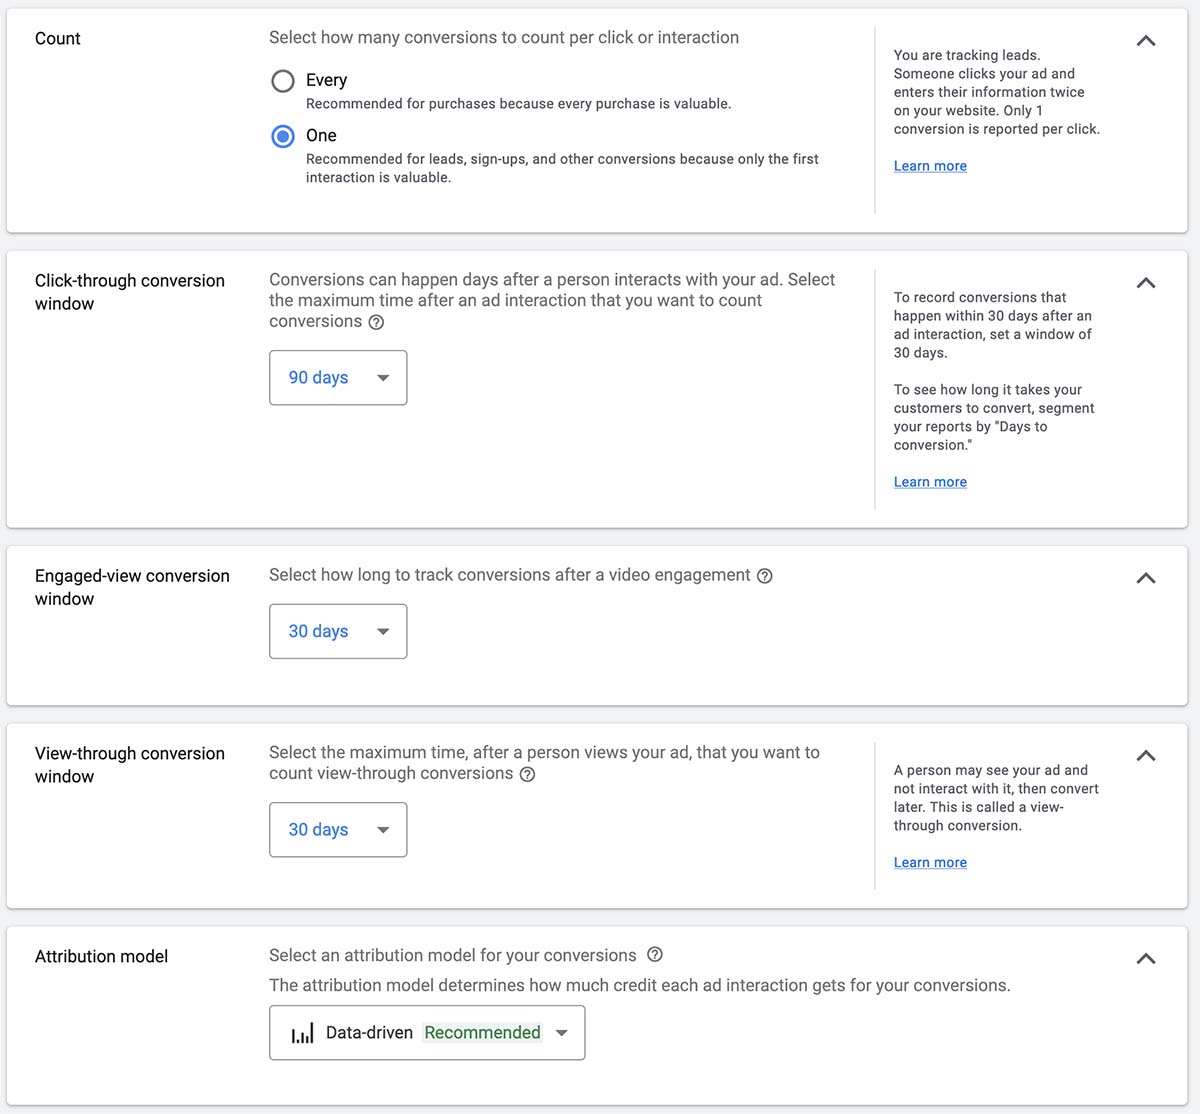
e. Set the Count for One, which is best for Leads – this way if a user fills out the forms multiple times, it won’t throw off our data too much. The other options I like to set to the longest period of time for tracking- this allows Google the most flexibility for tracking conversions.
Step 8: Implement the code in Google Tag Manager
a. Copy the Conversion ID and Conversion Label from Google Ads
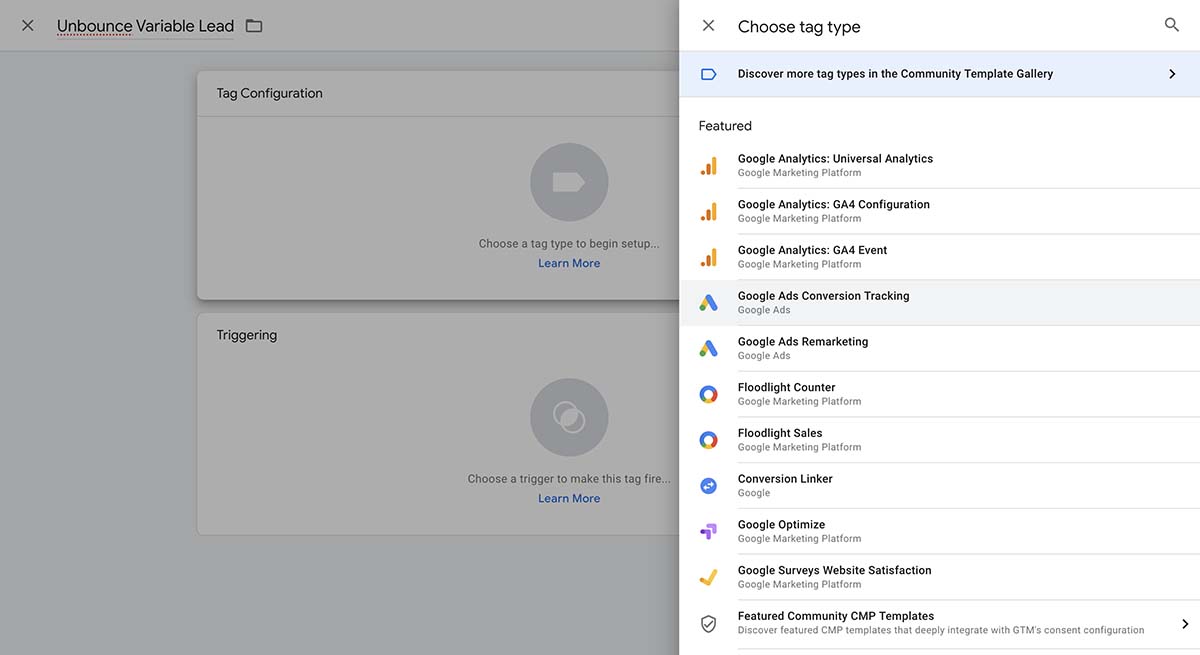
b. Create a new Google Ads Conversion Tracking Tag in Google Tag Manager
c. Use the Conversion ID and Conversion Label from Google Ads, with the unique Trigger from Tag Manager, to create a separate tag for each form variable, and attribute a value for how much the lead would be worth- if your average lead is worth $100, but some types of clients drive twice as much revenue, then you can set their Conversion Value to $200. Google won’t charge extra for these conversions, but this can help calculate your Return On Ad Spend (ROAS) of your campaign, and Return On Investment (ROI) of your marketing.
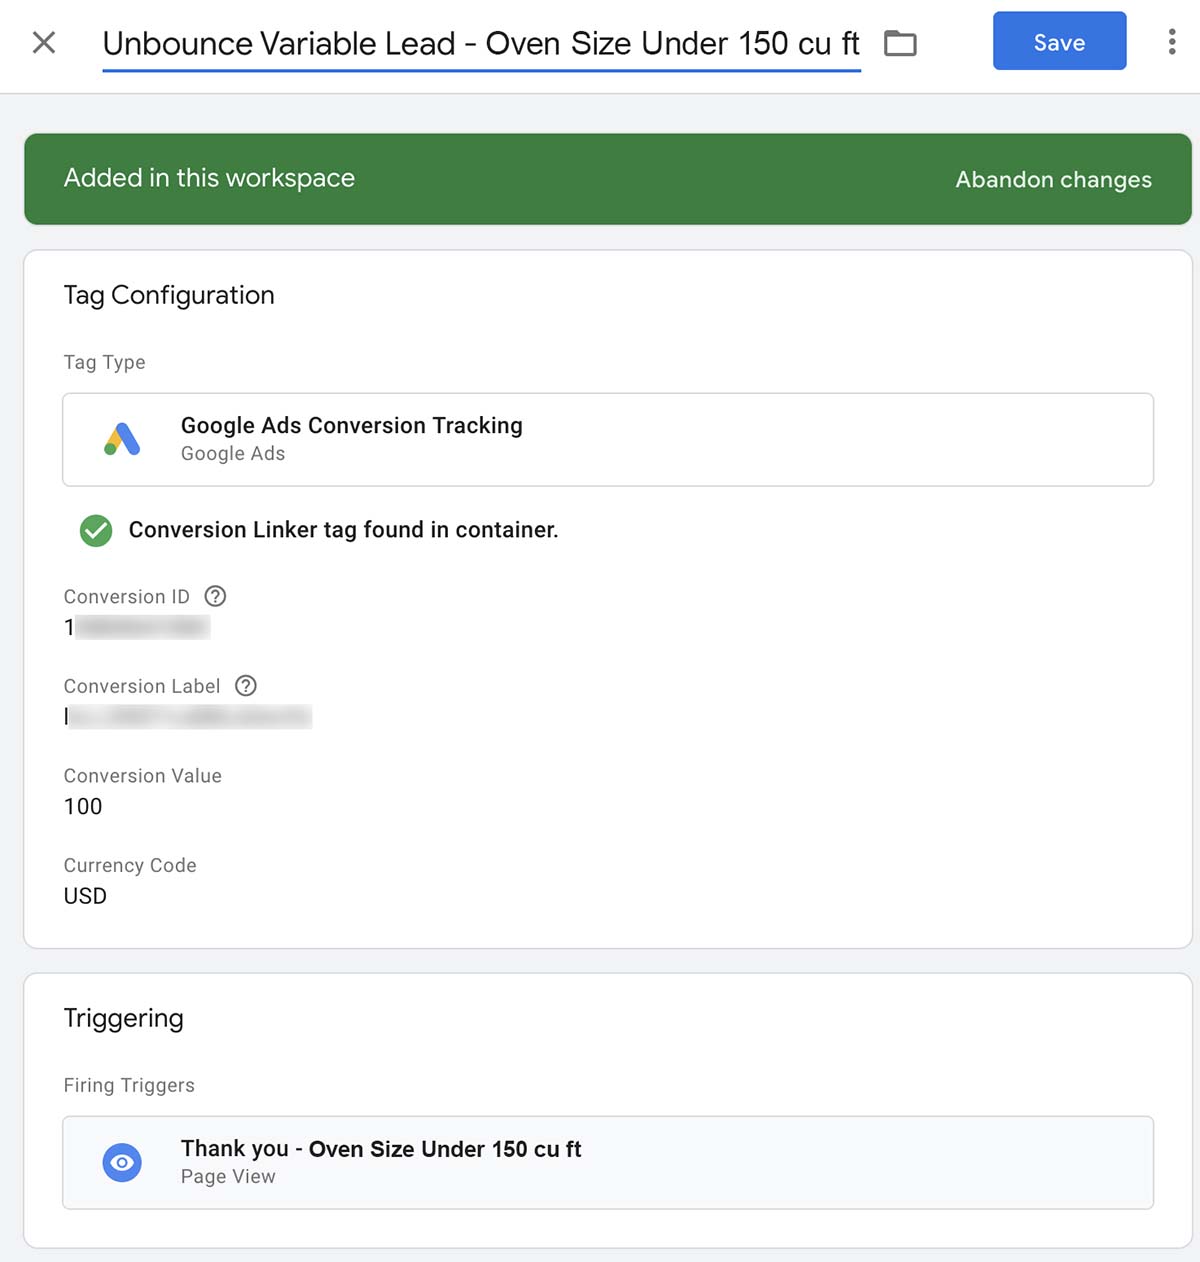
d. Create a unique Tag for all Triggers
e. Once completed, click “Submit,” and publish the tag configuration

There are a lot of steps to follow, but once your setup is operational, the feedback to the ad platform (Google in this case, but this will also work with Meta) will continuously optimize your advertising conversions and the platforms will continuously optimize for more users that are likely to convert.
And when you can differentiate lower-value leads versus higher-value leads, the system can be further updated and optimized. When the ad platform is targeting conversions, it is important to create your own values if your product or service has an indirect monetary value, and you can’t have an apples-to-apples comparison of revenue to ad spend.